Acquia Source · DDEV · Claude Code

Migrate a website with AI

From a blank folder to a working Storybook migration, connected Acquia Source site, and an exported evaluation report.

18 guided steps 5–10 minute setup No Python virtual environment
01Create the Source site
02Install locally
03Connect OAuth
04Run the migration
05Grade and export

Before you start

What you need

  • macOS or Linux, or Windows with WSL and Ubuntu
  • Docker running
  • A Claude account for Claude Code
  • The URL of the site to migrate
  • A blank local project folder
DDEV is includedYou do not need to install DDEV first; the installer handles that for you.
Acquia Source is one routeThis tutorial demonstrates the Acquia Source setup, so you need Source access to follow every step here. The installer also supports Drupal CMS without Acquia Source.
Timing Initial setup takes around 5–10 minutes. A complete AI migration can take up to an hour and use a substantial number of tokens.
Part 1

Create the Acquia Source site

Prepare the hosted Canvas site that will receive your migrated components and page.

1
Acquia Source

Sign in and launch Source

Sign in to your Acquia account. From the dashboard, launch Acquia Source.
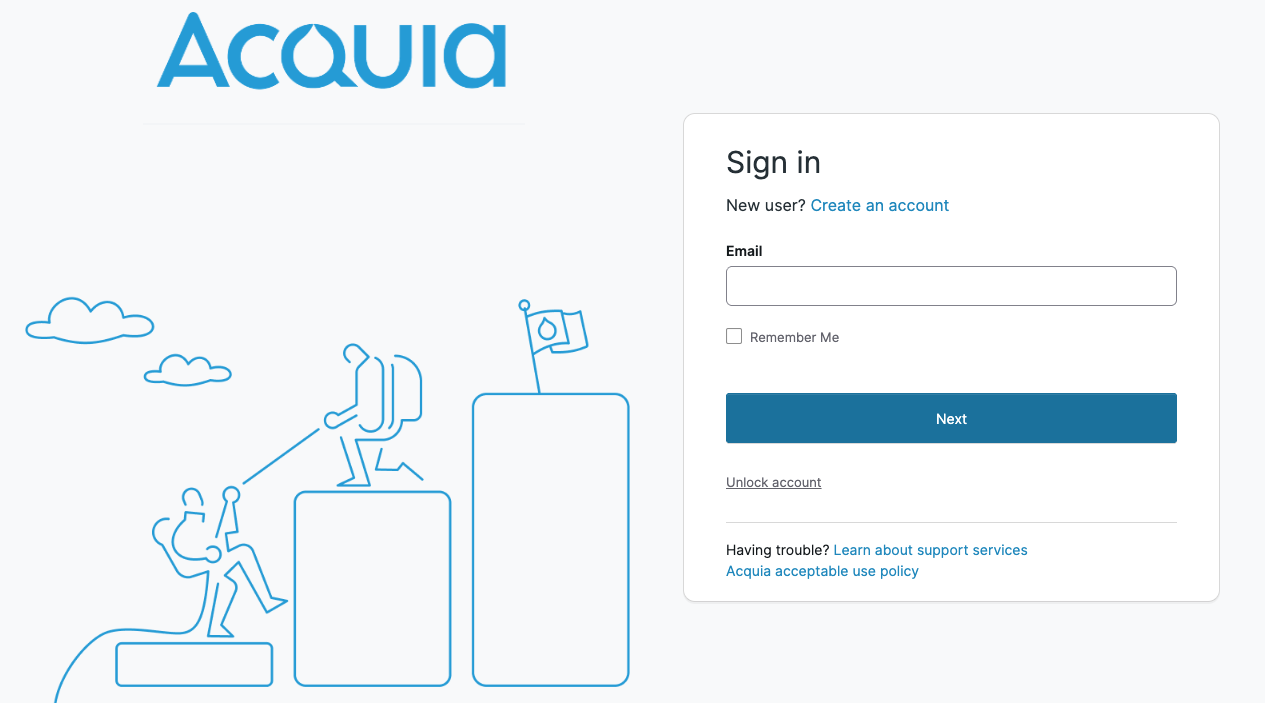
Acquia sign-in page
Select the screenshot to open it at full size.
2
Acquia Source

Select the organization

Choose the organization that will own the new site.
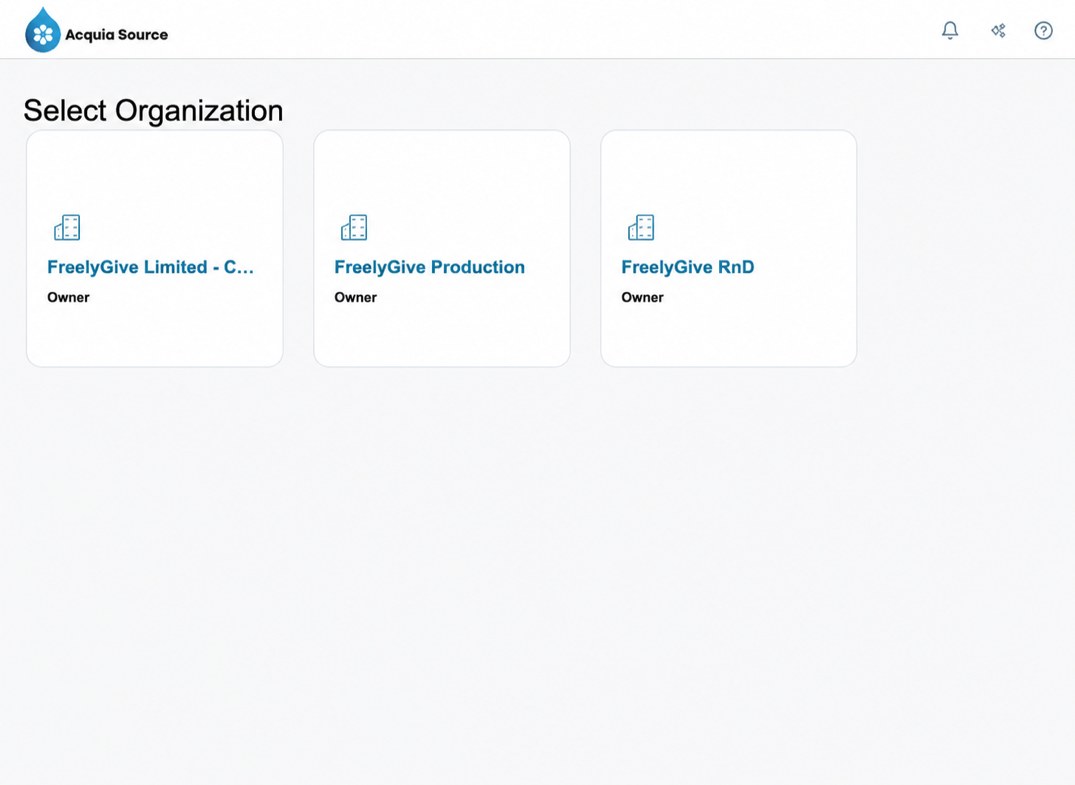
Acquia Source organization selection cards
Personal names and email addresses have been removed from this documentation image.
3
Acquia Source

Create a site

On the Sites page, select Create Site.
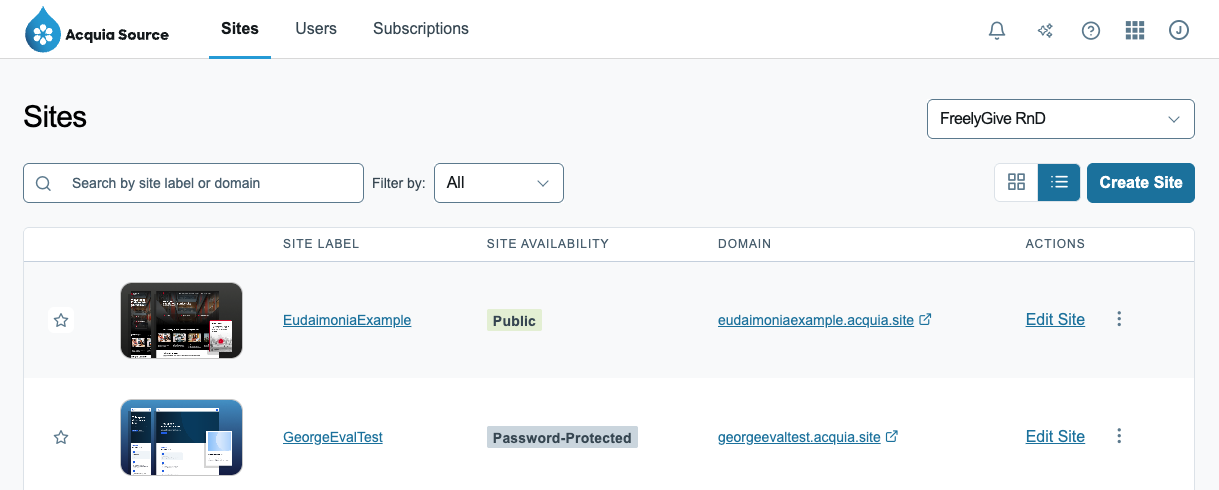
Acquia Source sites list with Create Site button
The sites list for the selected organization.
4
Acquia Source

Choose the Acquia Site Template

Find Acquia Site Template and select it.
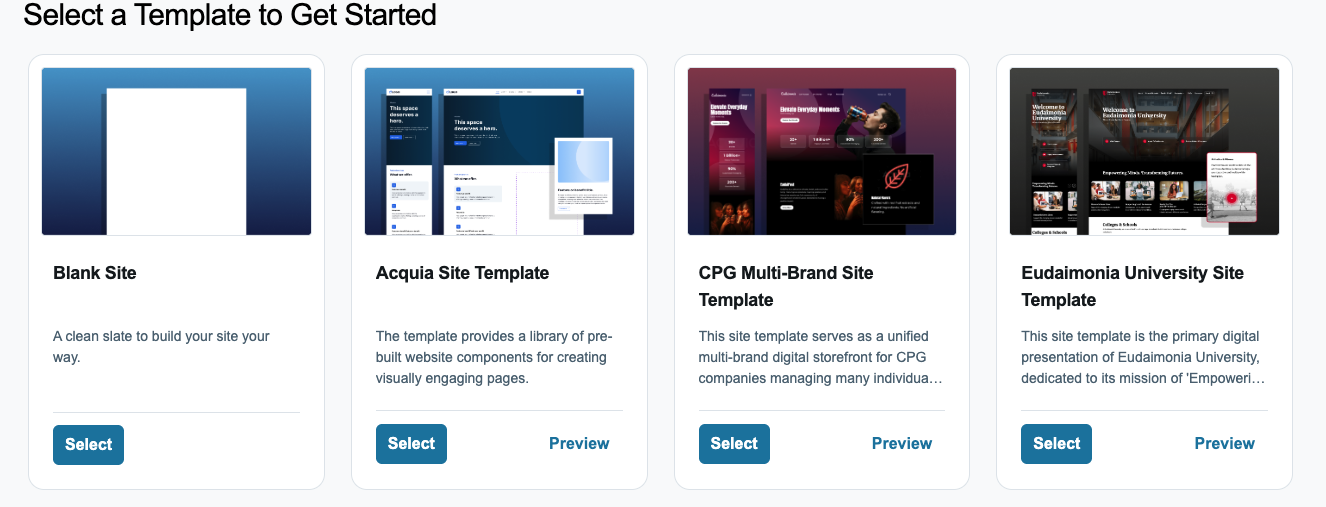
Acquia Source template choices
Select Acquia Site Template, rather than Blank Site.
5
Acquia Source

Name the site

Enter a short, recognizable site label and select Start Building. Wait until Source finishes creating the site.
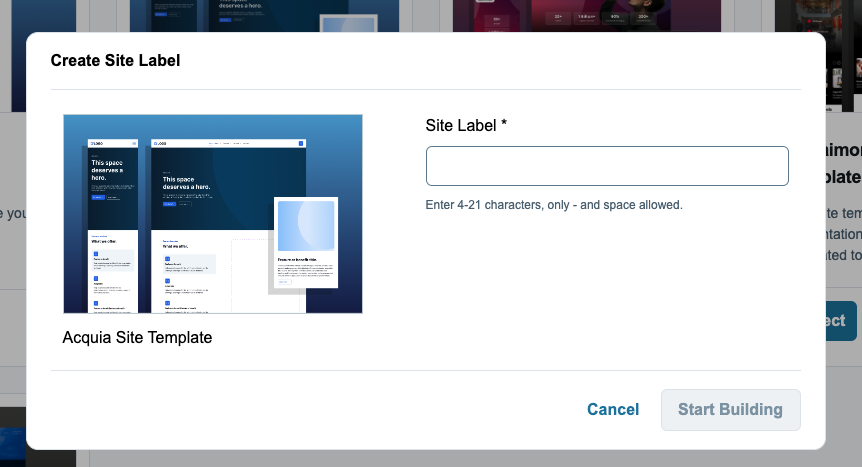
Create Site Label dialog
Use a label that makes the migration easy to find later.
Part 2

Install the migration tooling

Build the DDEV and Storybook project locally in one blank folder.

6
Terminal

Open a blank project folder

Create and enter a folder for the migration. The installer builds the project in this folder.

mkdir freelygive-migration
cd freelygive-migration

The installer is linked from the Canvas AI Migrations project page on Drupal.org.
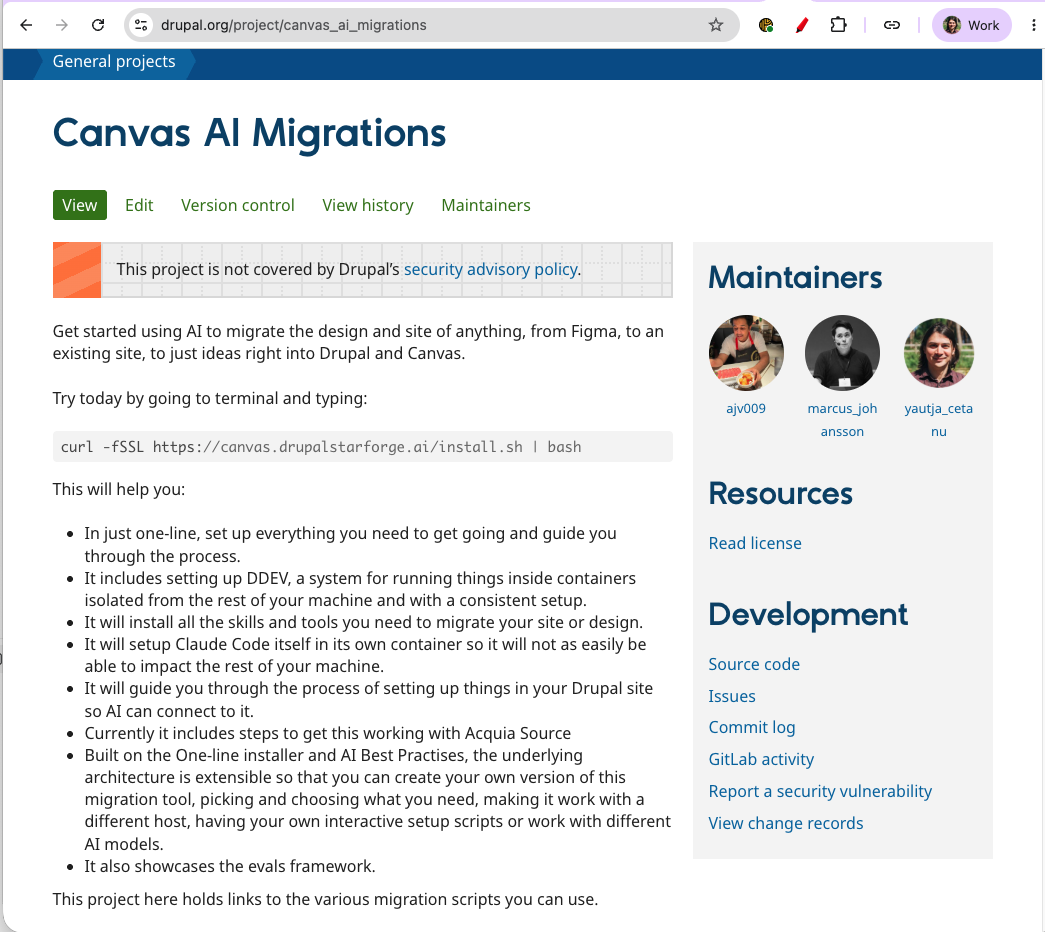
Canvas AI Migrations project page on Drupal.org
The project page explains the one-line installer and its purpose.

Run the current installer command:

curl -fSSL https://canvas.drupalstarforge.ai/install.sh | bash
7
Terminal

Choose Simple Acquia Source

Choose Simple Acquia Source. This creates a Storybook component library connected to a hosted Source site.
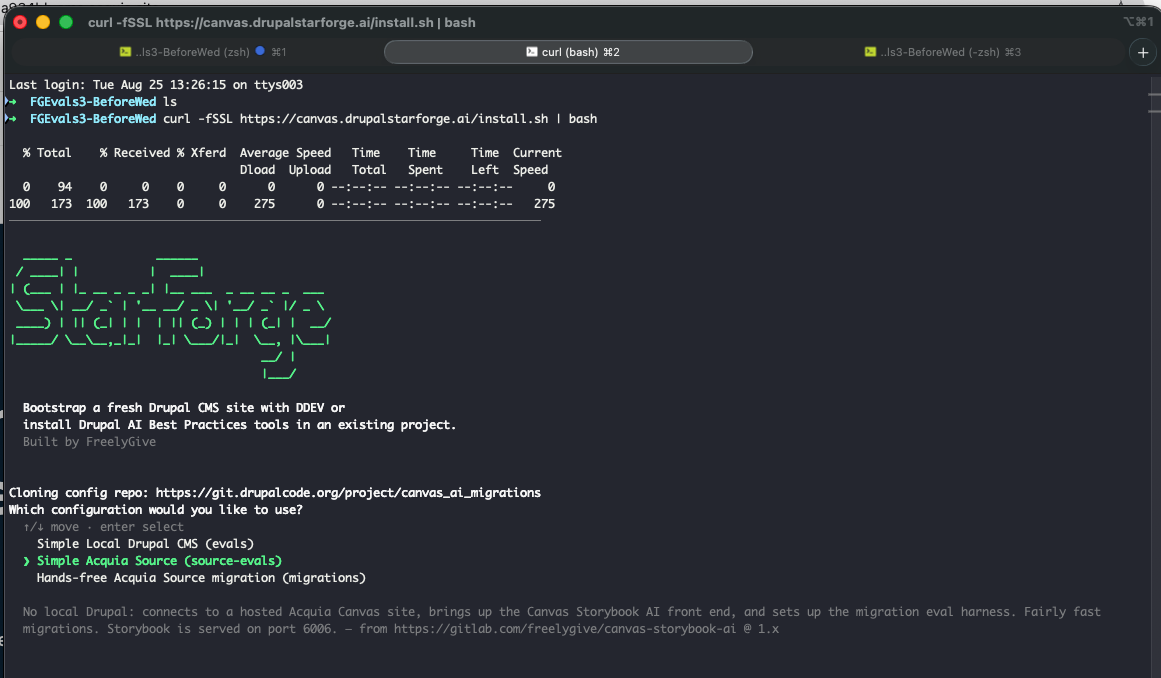
Terminal config picker with Simple Acquia Source selected
Use the hosted Acquia Source configuration.

When asked for a project name, press Enter to use the current folder name.
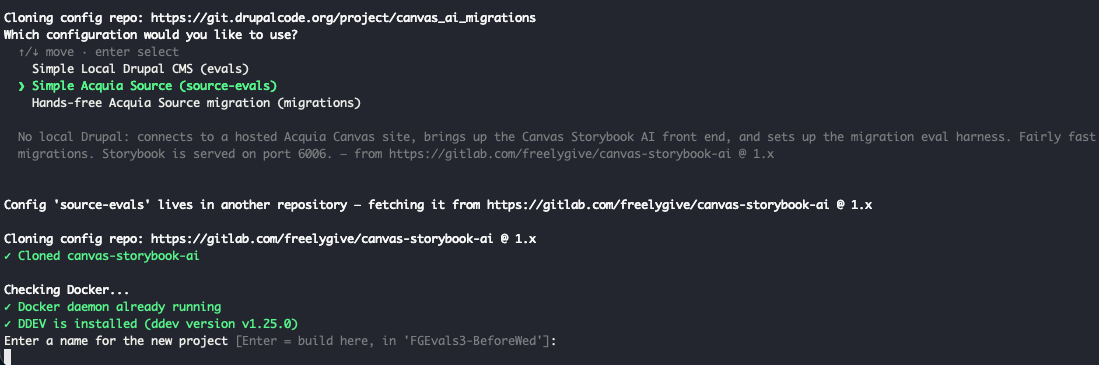
Terminal project name prompt
Leaving the prompt blank uses the folder name.
8
Terminal

Let DDEV finish

The first installation builds containers and installs Storybook, browser tooling, Claude Code, and the migration skills.
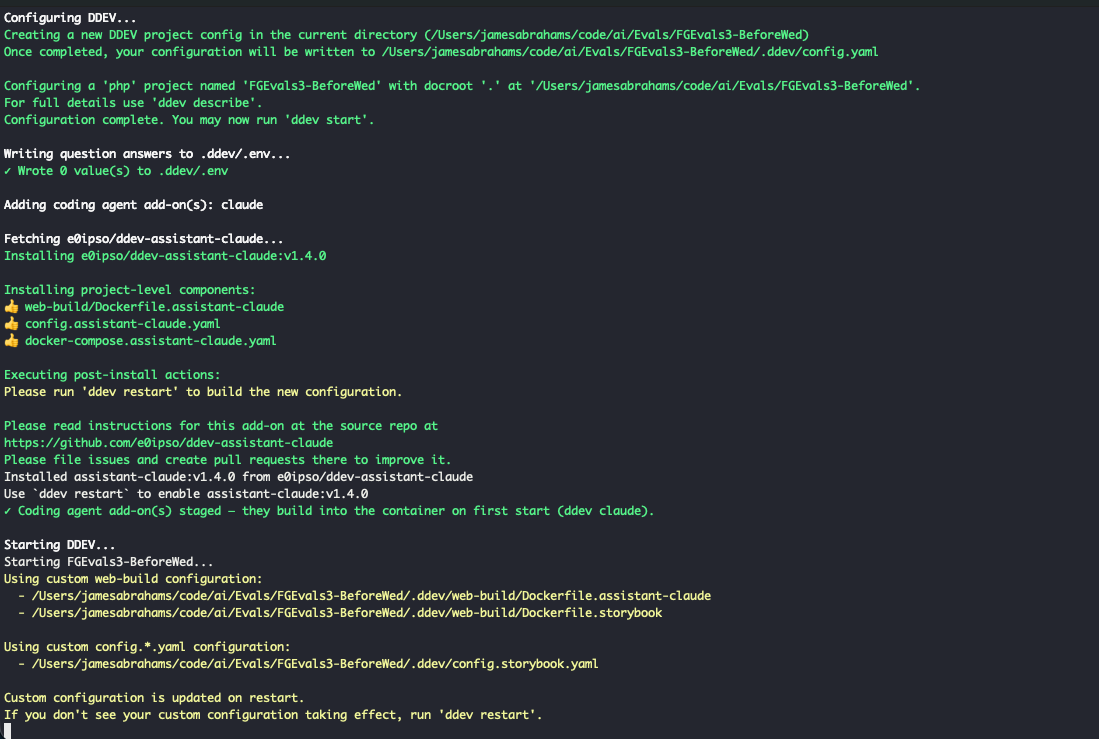
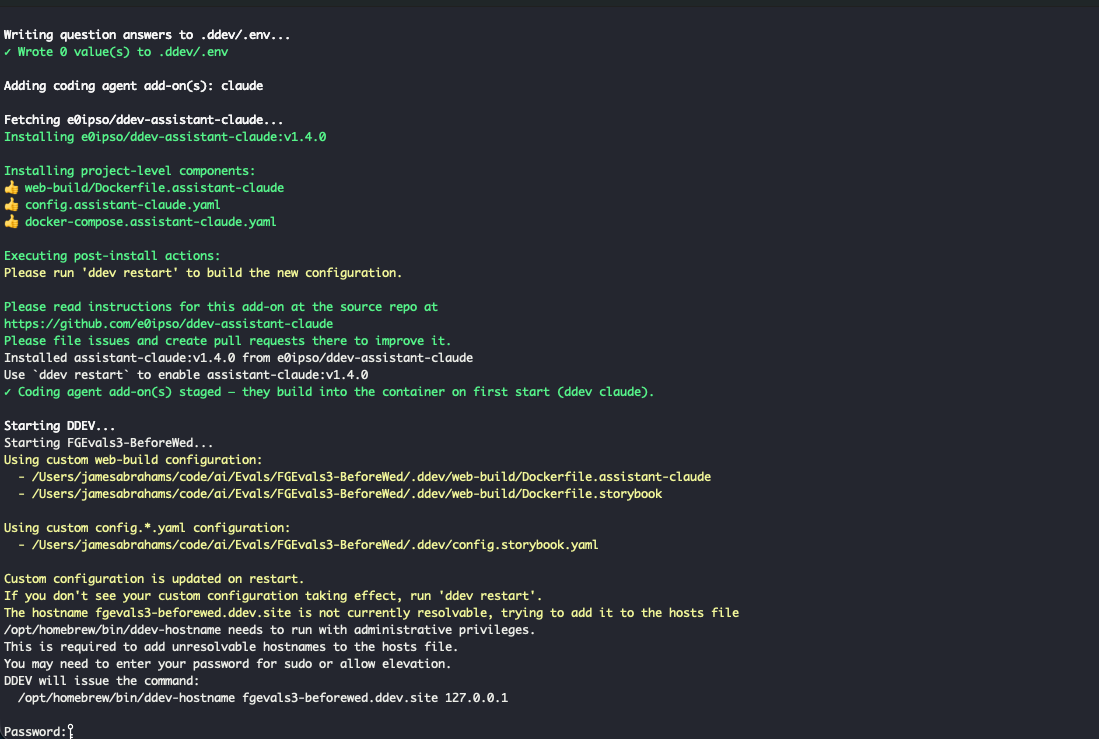
DDEV installation output in Terminal
The first DDEV build is the slowest.
macOS password promptmacOS may request your administrator password so DDEV can add the local hostname. Type it directly in Terminal. No characters appear while you type.
Administrator password prompt in Terminal
This password stays in your Terminal; do not send it to an AI assistant.
Part 3

Connect the project to Source

The wizard needs the Drupal API endpoint and the visitor-facing website address.

9
Terminal

Start the connection wizard

At the end of installation, answer Y when asked whether to set up the Acquia Source connection.
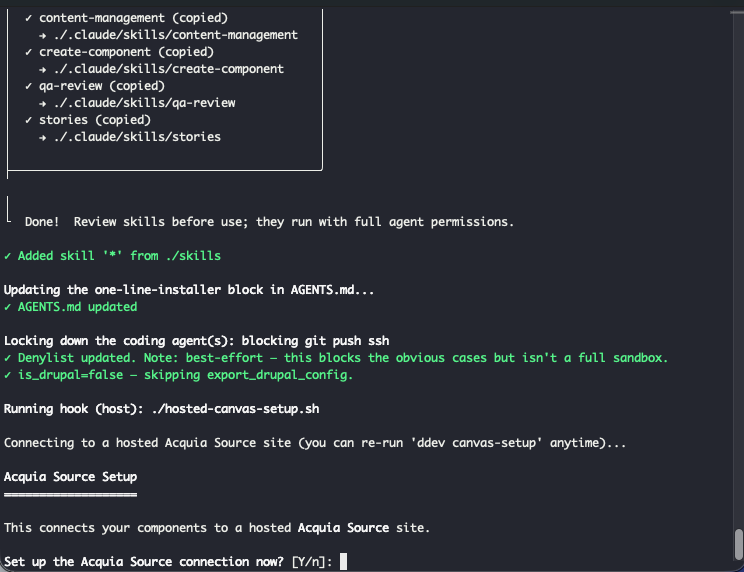
Acquia Source connection wizard in Terminal
The same wizard can be reopened later with ddev canvas-setup.
CMS / API URLhttps://<site-uuid>.cms.acquia.site
Public site URLhttps://<site-domain>.acquia.site
10
Acquia Source

Find the CMS / API URL

From the Source sites list, select Edit Site. When the editor opens, copy only the origin from the address bar: https:// plus the hostname ending in .cms.acquia.site.
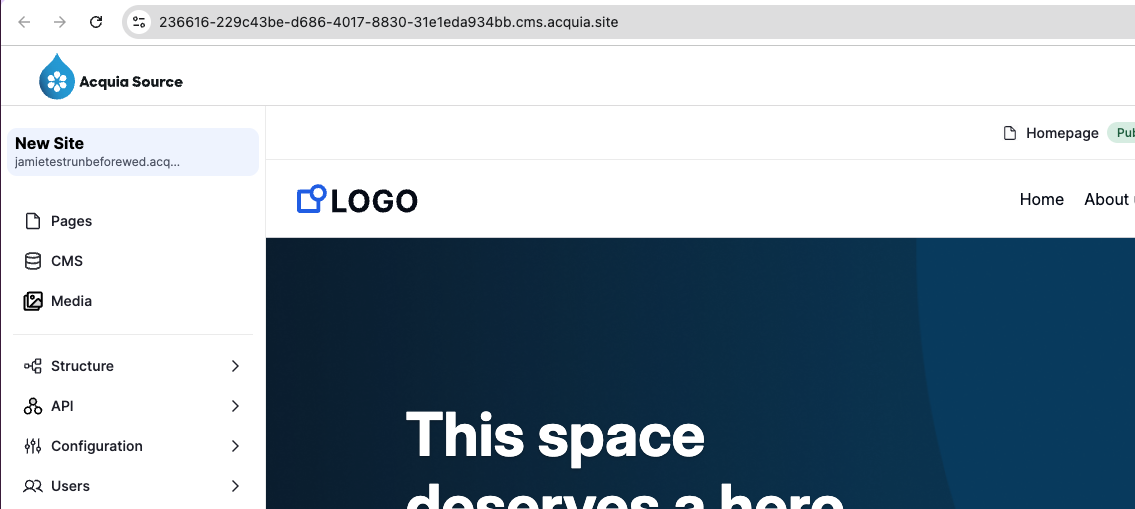
Acquia Source editor showing the CMS API hostname
The CMS/API host appears in the editor address bar.
Do not use the management URLThe address beginning source.acquia.com/sites/… is the Source dashboard, not the CMS/API endpoint.
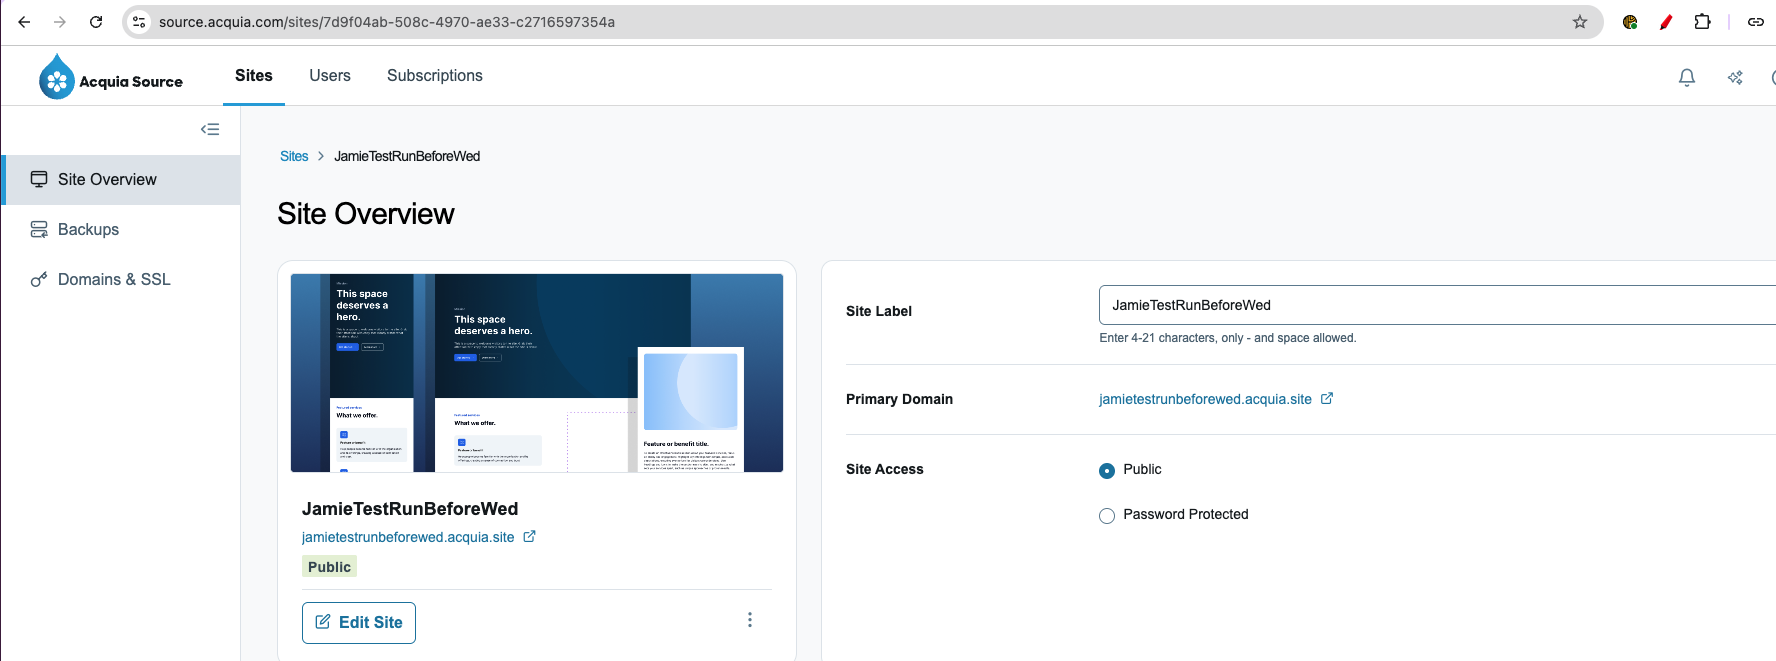
Acquia Source management URL that should not be used as the API endpoint
This management page URL is not the value the wizard needs.
11
Acquia Source

Find the public site URL

Return to the Source Sites list and copy the value in the Domain column. Include https:// when entering it in Terminal.
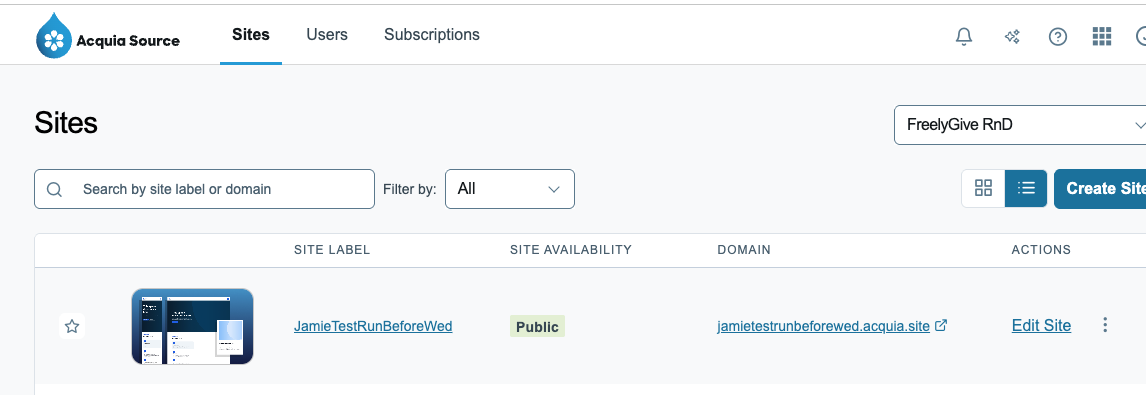
Public domain in the Acquia Source sites list
The public URL is the address visitors will use.
12
Terminal

Enter the connection details

  1. Paste the CMS/API URL.
  2. Paste the public site URL.
  3. Press Enter to accept canvas-ai as the OAuth client name.
  4. Leave the secret blank so the wizard generates a strong one.
  5. Press Enter to accept api as the JSON:API prefix.
Acquia Source URL and OAuth prompts in Terminal
The default client name and JSON:API prefix are suitable for this setup.
Protect the generated secretKeep it in Terminal and .env. Never include it in screenshots, documentation, chat messages, or Git.
Part 4

Create the API client

Authorize the local Canvas tools to read and write the Source site.

13
Acquia Source

Open the API clients page

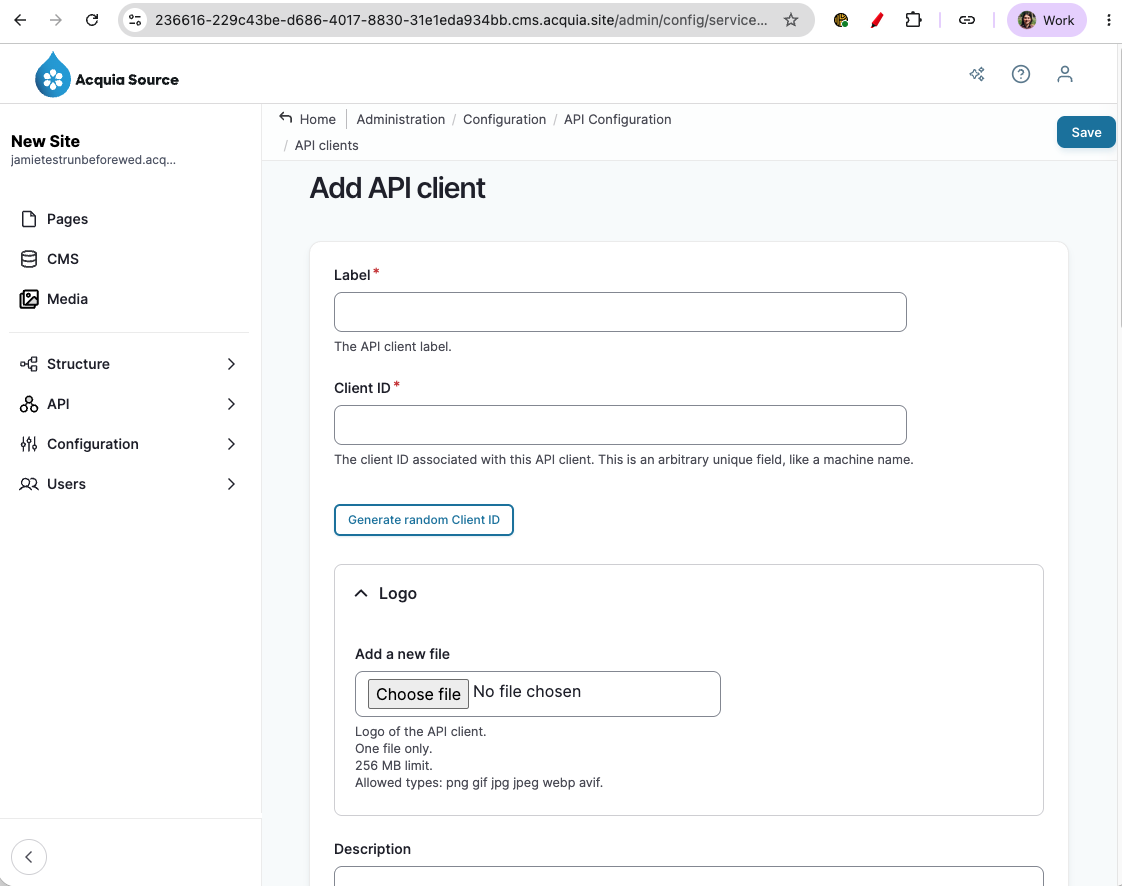
Open the direct link printed by the wizard. You can also navigate to Configuration → Simple OAuth → Clients.
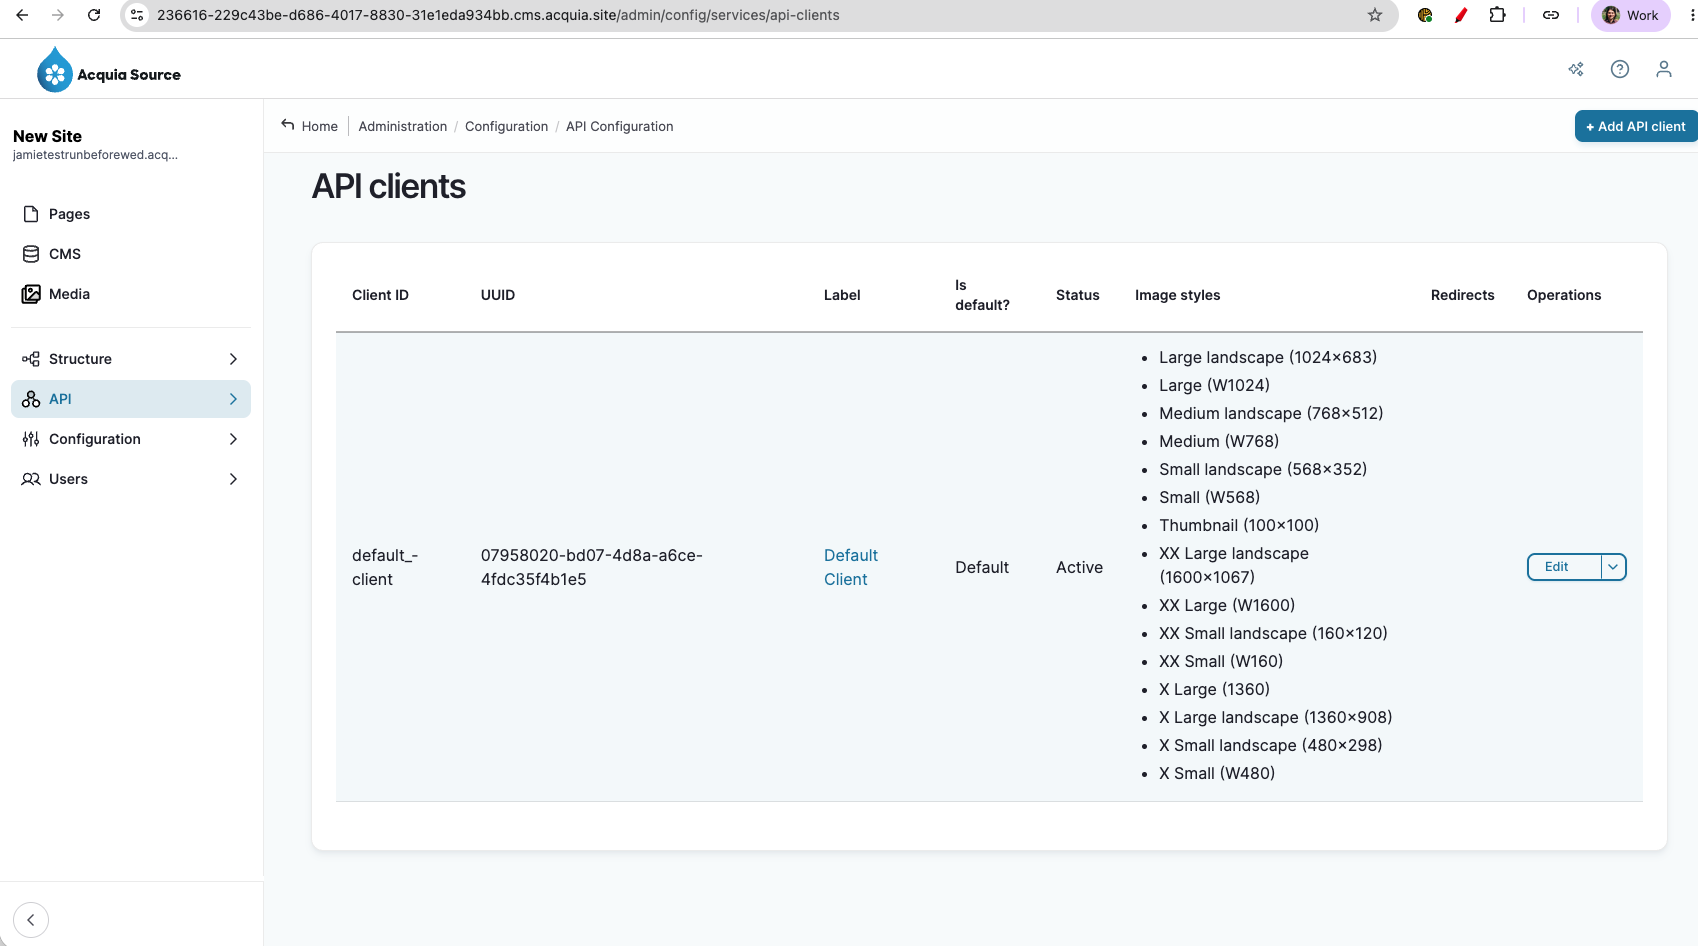
Acquia Source API clients page
The wizard gives you a direct link to this screen.

Select Add API client.

Add API client form
Create a dedicated client for the migration tooling.
14
Acquia Source

Configure and save the client

Use the values printed by the terminal wizard.

LabelCanvas AI
Client IDcanvas-ai
New secretGenerated in Terminal
Grant typeClient Credentials
ScopesAll available scopes
UserYour Source administrator
Third partyOff
ConfidentialOn
StatusEnabled

Select Save.

15
Terminal

Test the connection

Return to Terminal, press Enter, and answer Y when asked to test the connection.

OAuth token obtained successfully.
JSON:API endpoint is reachable.
API setup complete!
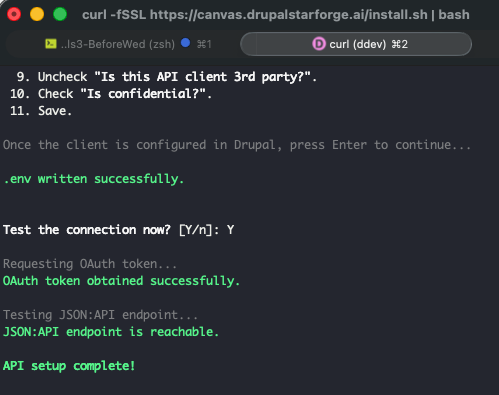
Successful OAuth and JSON API connection test
Both checks must succeed before the migration pushes to Source.
Part 5

Open Storybook and run the migration

Use Claude Code inside DDEV to inspect the source site and assemble the new page.

16
Browser

Check Storybook

Storybook opens automatically when installation finishes. It contains the component library and example page the migration will replace.
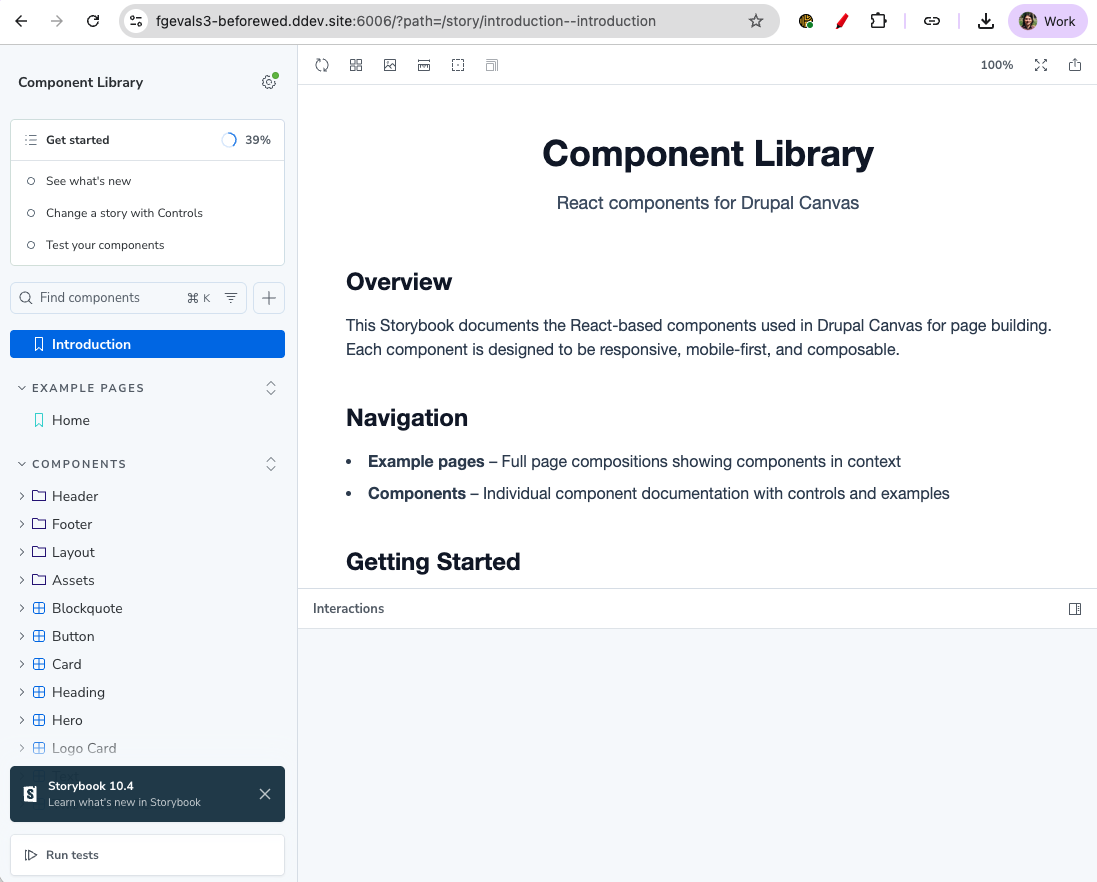
Storybook component library
The local Storybook runs through DDEV on port 6006.

Reopen it later with:

ddev launch :6006
17
Terminal

Start and authorize Claude Code

From the project folder, run:

ddev claude
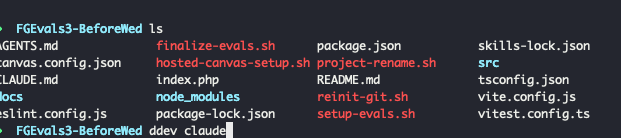
Starting Claude Code with DDEV
Claude runs inside the project container.

The first time, sign in through the browser and select Authorize.
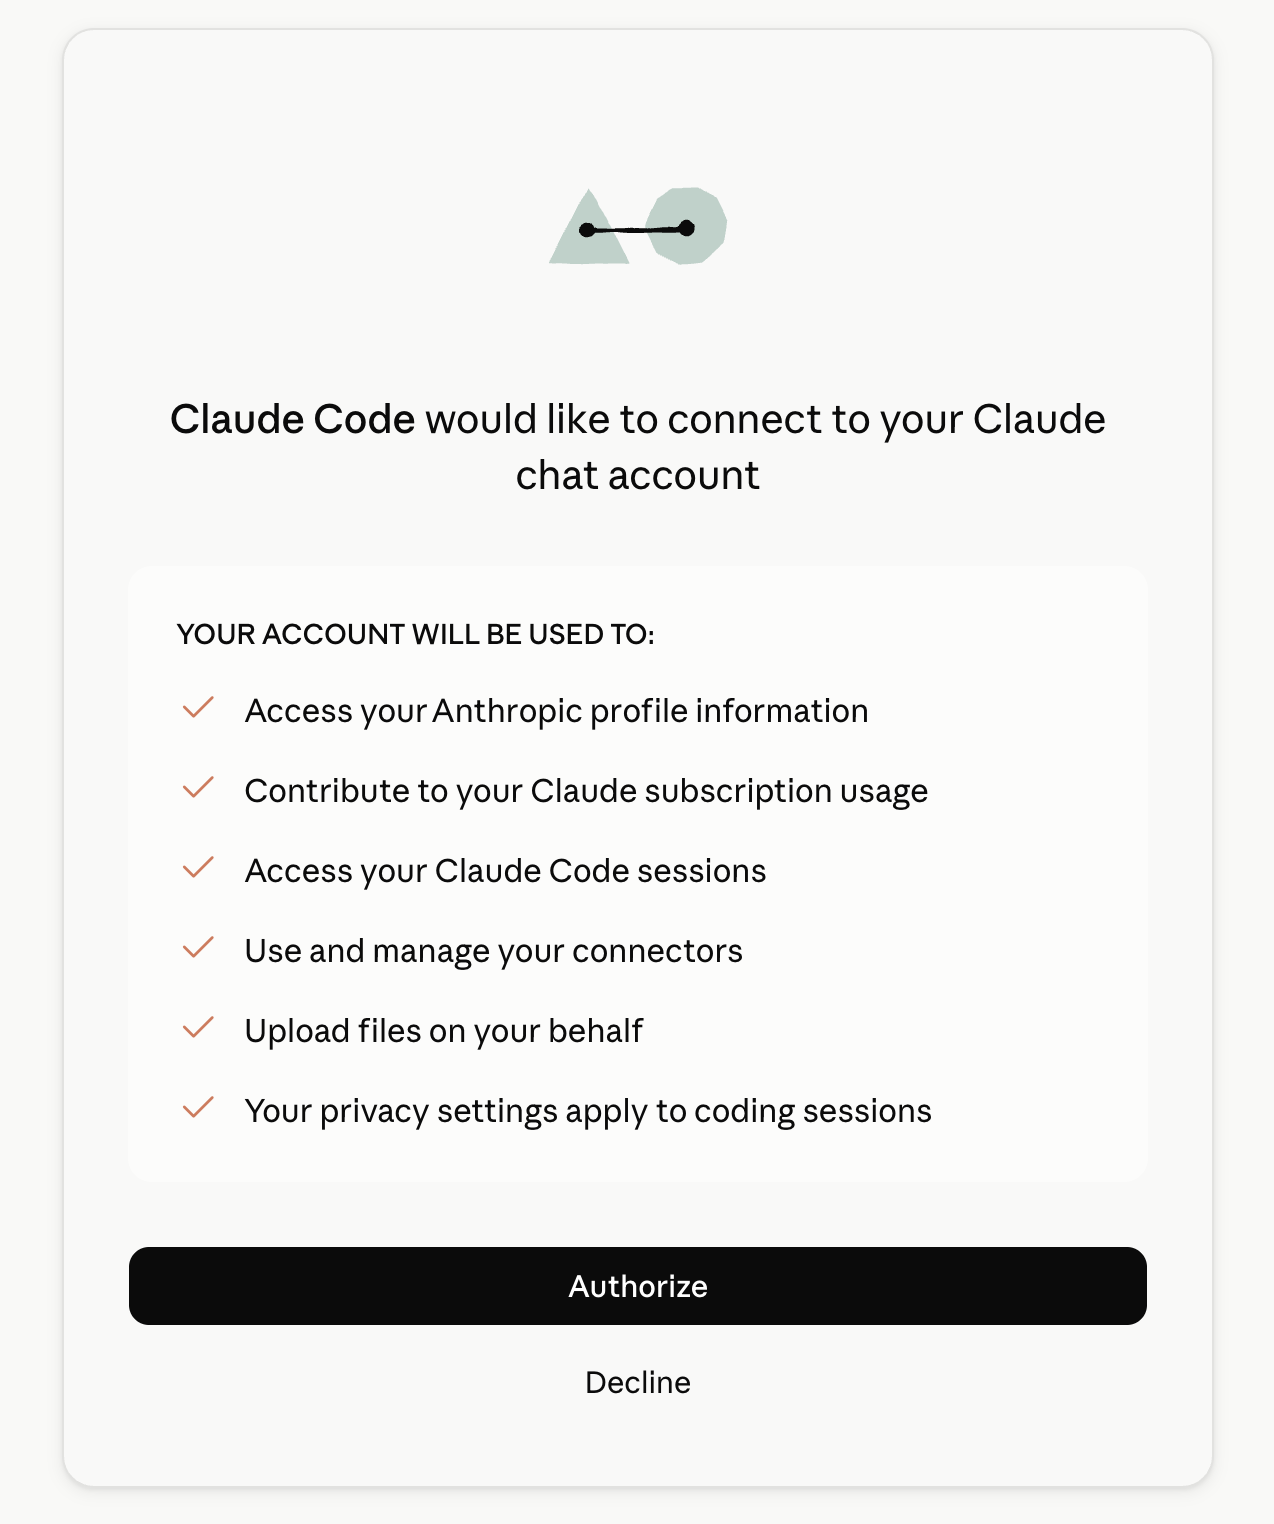
Claude Code authorization screen
Review the requested permissions before authorizing.
Keep authorization privateDo not share screenshots containing your sign-in email or the temporary Claude authorization URL.
18
Claude Code

Run the building-ui migration

Inside Claude Code, enter:

/building-ui https://freelygive.io/ and name the storybook page example-pages-freelygive--freely-give and after you are done export it to Source right away
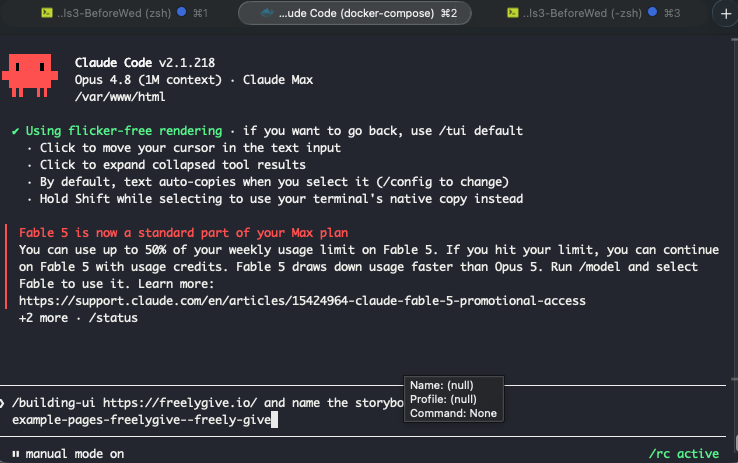
The building-ui command entered in Claude Code
Name the page consistently so the evaluator can target it.

Choose Like-for-like when asked for the approach, then choose the desired fidelity. Claude inspects the site, creates or reuses components, assembles the page, and checks the result.
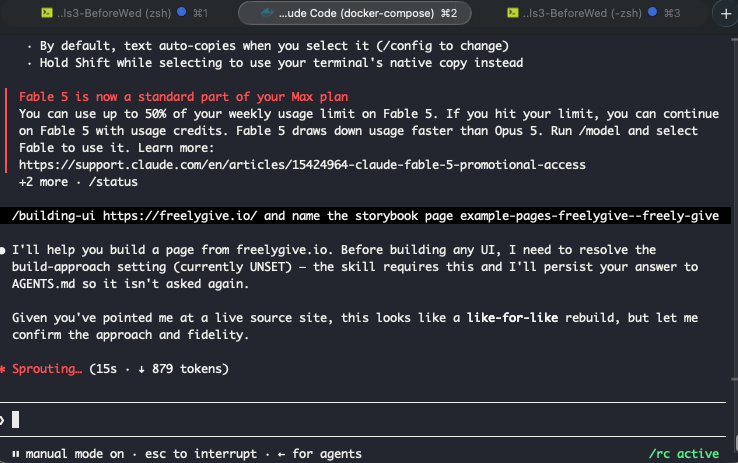
Claude beginning the website migration
The agent confirms the build approach before changing the project.

For a long-running demonstration, use Shift+Tab to switch to auto mode after reviewing Claude Code's permissions and risks.
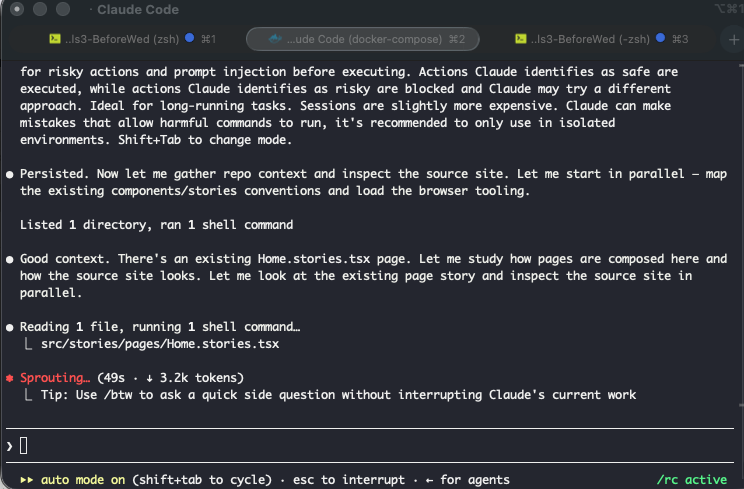
Claude Code running in auto mode
A full migration can take around an hour.

When it finishes, leave Claude Code with exit.

Part 6

Grade and export the result

Run the evaluation in a new Terminal from the project folder.

Terminal

Run the evaluation

No Python virtual environment is required. Grade the migrated Storybook page:

ddev eval ABP_PAGE_STORY_ID=example-pages-freelygive--freely-give grade

View the newest scoreboard:

ddev eval view

Export it as an HTML report:

ddev eval export
Read the result, not only the exit codeThe grade can take 5–10 minutes. A non-zero result can mean the migration failed one or more evaluations; it does not automatically mean the tooling failed.

Next session

Returning in a new Terminal

For later sessions, the routine is short:

cd /path/to/your/migration-project
ddev start
ddev claude

To run the evaluation again:

ddev eval ABP_PAGE_STORY_ID=example-pages-freelygive--freely-give grade
ddev eval view
ddev eval export

Keep credentials private

  • .env contains Source URLs and OAuth credentials and must remain uncommitted.
  • Never publish the generated OAuth client secret.
  • Never publish a Claude authorization URL.
  • Review every screenshot for names, emails, avatars, tokens, and secrets before publishing it.